How to Install Adhesive Vinyl Text and Graphics on Your Car: Step-by-Step Guide
How to Install Adhesive Vinyl Text and Graphics on Your Car: Step-by-Step Guide
| Product Code: | How to Install Adhesive Vinyl Text and Graphics on Your Car |
| Availability: | Out Of Stock |
Description
How to Install a Vinyl Graphic and Text on Your Car: Step-by-Step GuideApplying a vinyl graphic to your car can be a straightforward process if done correctly. Follow this guide to achieve a professional, bubble-free finish that enhances your vehicle's appearance.
Materials Needed:
Vinyl graphic
Measuring tape
Masking tape
Squeegee or credit card
Sharp blade or scissors
Microfibre cloth
Heat gun or hair dryer (optional)
Step 1: Clean the Surface
Start by thoroughly cleaning the area of the car where the vinyl graphic will be applied. Use a microfibre cloth and an automotive cleaner to remove any dirt, dust, wax, or grease. Ensuring a clean surface is crucial for the vinyl to adhere properly and last longer.
Step 2: Position the Vinyl Graphic
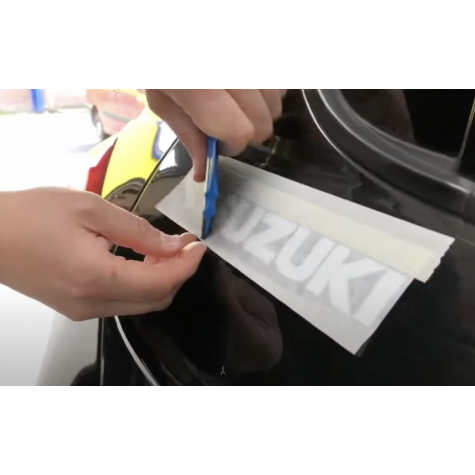
With the surface prepared, position the vinyl graphic on the car. Use masking tape to hold it in place temporarily. Measure and align the graphic to ensure it’s straight and centred. It's a good idea to step back and check the positioning from various angles to confirm it’s where you want it.
Step 3: Apply the Vinyl Graphic
Carefully peel back a small section of the vinyl’s backing from one edge. Begin applying the exposed edge of the vinyl to the car’s surface, using your fingers to press it down lightly. Slowly peel away the rest of the backing as you apply the graphic, smoothing it with a squeegee or credit card as you go. Work slowly and steadily, applying even pressure to avoid creating air bubbles.
Step 4: Smooth Out Air Bubbles
As you apply the vinyl, use a squeegee to firmly press the graphic onto the surface, working from the centre outwards to push out any air bubbles. If small bubbles do appear, you can gently lift the vinyl and reapply it, or use a pin to carefully pop the bubble and smooth it out with the squeegee.
Step 5: Trim the Edges
Once the vinyl graphic is fully applied and free of bubbles, use a sharp blade or scissors to trim any excess vinyl around the edges. Follow the contours of the car’s surface to ensure a clean, seamless finish. Be precise to avoid cutting too close to the paint.
Step 6: Secure and Set the Graphic
To help the vinyl graphic adhere securely, you can use a heat gun or hair dryer to gently warm the vinyl. This makes the vinyl more pliable, allowing it to conform better to the car’s surface. Be cautious not to overheat, as this can damage the vinyl.
Step 7: Final Touches
After applying the graphic, let it sit undisturbed for a few hours to ensure full adhesion. Inspect the graphic one last time to smooth out any remaining bubbles or imperfections. Your vinyl graphic is now installed, providing a customised, professional look to your vehicle.
Price
-
£0.00
Tags: fitting guide, how to, Vinyl Graphics Installation, Car Text Application, DIY Vinyl Decals, Vehicle Customisation, Vinyl Sticker Tips, Automotive Graphics, Professional Vinyl Application, Car Graphics Guide, Text Decals for Cars, Custom Car Design


