How to Install a Vinyl Sunstrip on Your Car: Step-by-Step Guide
How to Install a Vinyl Sunstrip on Your Car: Step-by-Step Guide
| Category: | How To Install Vinyl Graphics |
| Product Code: | How to Install a Vinyl Sunstrip on Your Car: Step-by-Step Guide |
| Availability: | Out Of Stock |
Description
How to Install a Vinyl Sunstrip on Your Car: Step-by-Step Guide
Installing a vinyl sunstrip on your car is an excellent way to reduce glare, enhance your vehicle's aesthetic, and showcase your style. Whether you're a car enthusiast or just looking to personalise your ride, this guide will walk you through the process of applying a vinyl sunstrip easily and effectively.
Materials Needed:
Vinyl sunstrip
Measuring tape
Masking tape
Squeegee or credit card
Spray bottle with water and a few drops of dish soap
Sharp blade or scissors
Microfibre cloth
Step 1: Prepare the Surface
Start by thoroughly cleaning the windshield where the sunstrip will be applied. Use a microfibre cloth and a glass cleaner to remove any dirt, dust, or debris. A clean surface is essential for the vinyl to adhere properly, preventing air bubbles and ensuring a smooth finish.
Step 2: Measure and Position the Sunstrip
Measure the width of your windshield to determine the placement of the sunstrip. Most sunstrips are pre-cut, but you may need to trim yours to fit your specific windshield. Use masking tape to temporarily secure the sunstrip in place, ensuring it's centred and aligned to your liking.
Step 3: Apply the Sunstrip
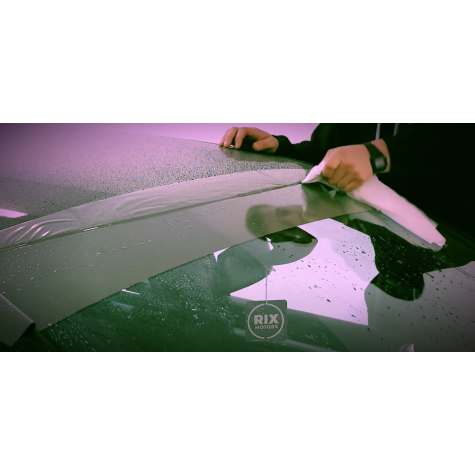
Before applying the sunstrip, spray the windshield with a mixture of water and dish soap. This will allow you to reposition the vinyl if needed. Peel the backing off the vinyl sunstrip and carefully position it on the windshield. Start from one side and work your way across, using a squeegee or a credit card to smooth out any air bubbles as you go.
Step 4: Remove Air Bubbles
As you apply the sunstrip, continue to use the squeegee to press out any air bubbles or excess water. Work from the centre outward to ensure the vinyl adheres smoothly and evenly to the windshield.
Step 5: Trim the Excess Vinyl
Once the sunstrip is fully applied and free of bubbles, use a sharp blade or scissors to trim any excess vinyl along the edges of the windshield. Be careful to follow the contour of the glass for a clean, professional look.
Step 6: Final Touches
Allow the sunstrip to dry completely before driving your car. Check for any remaining bubbles and use the squeegee to smooth them out if necessary. Once dry, your new vinyl sunstrip will provide a sleek, custom look and improved driving comfort.
By following this step-by-step guide on how to install a vinyl sunstrip on your car, you’ll enhance your vehicle’s style and functionality. Proper installation ensures long-lasting results, reducing glare and adding a personal touch to your ride. For more car customization tips and detailed installation guides, explore our other resources.
Price
-
£0.00
Tags: how to, Car Sunstrip Installation, Sunstrip Fitting Guide, Vinyl Sunstrip Application, DIY Sunstrip Install, Automotive Vinyl Guide, Windshield Sunstrip, Car Customization Tips, Sunstrip Installation Tips, Vehicle Accessories, Glare Reduction


